Let's learn, share & inspire each other. Sign up now 🤘🏼
Let's learn, share & inspire each other. Sign up now 🤘🏼
 ARTICLE
 14 min read
Deploying Machine Learning Models with Heroku
Building and deploying data-driven intelligent systems at scale has been of great interest lately to organizations operating in the machine learning space. This has not only led to the rapid evolution of efficient and accurate systems but has also had a profound contribution in improving the overall end-user experience by using intelligence-embedded products.
Due to the various benefits associated with intelligence-embedded software, managing machine learning models in the deployment stage has become an essential skill for machine learning engineers today. This, sometimes, can even require separate teams to release and manage the product in deployment.
Therefore, this post will provide a detailed overview of how you can take your trained model to deployment. Specifically, I will demonstrate the use of Flask to create a web application and then use Heroku to deploy the machine learning model to the cloud.
The highlight of the article is as follows:
What is Deployment?
Step 1: Developing the Machine Learning Model
Step 2: Creating a Web Application using Flask
Step 3: Deploying the Application to a Heroku Server
Conclusion
For starters, deployment is the process of integrating a trained machine learning model into a production environment, usually intended to serve an end-user.
Deployment is typically the last stage in the development lifecycle of a machine learning product. A brief overview of the development lifecycle is depicted in the image below:

The development lifecycle of machine learning product (Image by author)
The “Model Deployment” stage above consists of a series of steps which are shown in the image below:
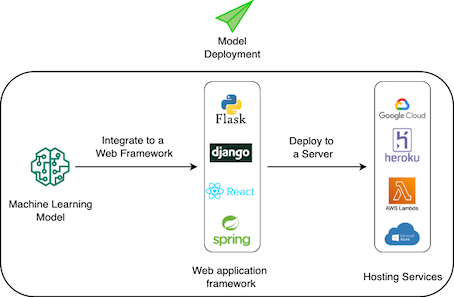
The model deployment stage (Image by author)
The three primary steps to deploy a machine learning model are as follows:
For the purpose of this tutorial, I will use Flask to build the web application. Moving ahead, I shall deploy the application on a Heroku server.
In this section, let’s train the machine learning model we intend to deploy. For simplicity and to not divert from the primary objective of this post, I will deploy a linear regression model.
I will train a linear regression model on a set of dummy data points depicted in the scatter plot below:
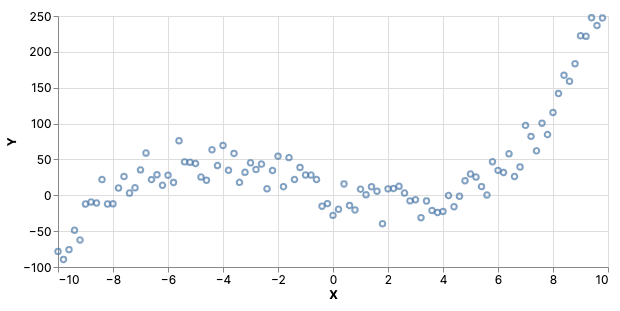
Scatter plot of the dummy data points (Image by author)
The mapping from the independent variable to x to the dependent variable y is implemented below:
Next, I will use scikit-learn to train a linear regression model. This is demonstrated below:
The regression line learned by the model is depicted below:
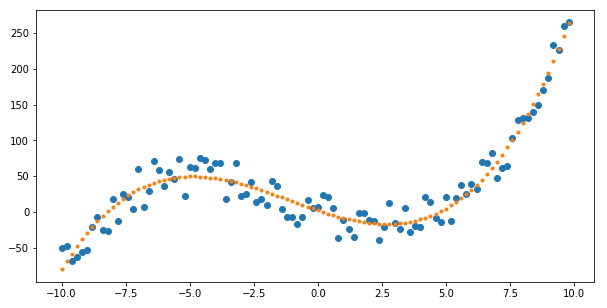
Scatter plot of the dummy data points with the regression line (Image by author)
To deploy the trained model on the Heroku server, you should save it as a pickle file, as shown in the code block below:
Flask is a popular web framework used to build lightweight web applications in python. As explained above, the purpose of using Flask in this project is to build a web application that an end-user can interact with.
In this section, I will use the model pickle file created in Step 1 and integrate it into the web application. The front-end of the web application will allow the user to provide input to the model. This will be fetched and delivered to the model running at the back-end to make a prediction. Finally, we will retrieve the model’s prediction and display it to the user.
To build a web application in Flask, you should install the Flask library in python. Open the command line and type the following command to install Flask:
pip install Flask
Ignoring the technical implementation for a while, the step-wise expected workflow of the web application should be as follows (in layman's terms):

The web application workflow (Image by author)
To build this web application in Flask, we need to code two files and integrate them together. These are:
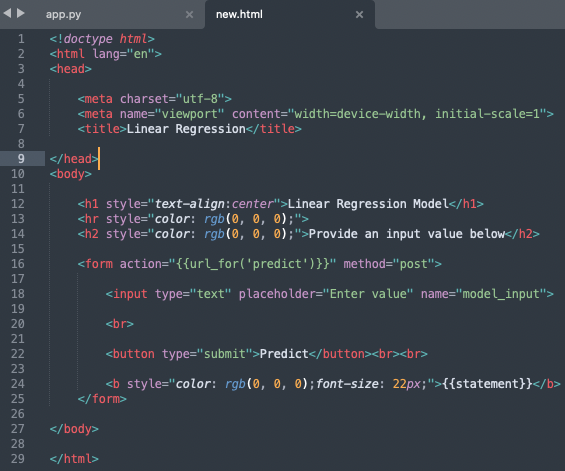
app.py: This file contains the Flask APIs that interact with the web page. It is responsible for fetching the input value, computing the prediction after loading the model, and returning it to the HTML file.new.html: As the name indicates, this file contains the front-end of our web application which the user will see.The current directory structure of the application is:
Linear_Regression_Model
├── templates
│   ├── new.html
├── app.py
└── model.pickle
The implementation for both the files is shown below:
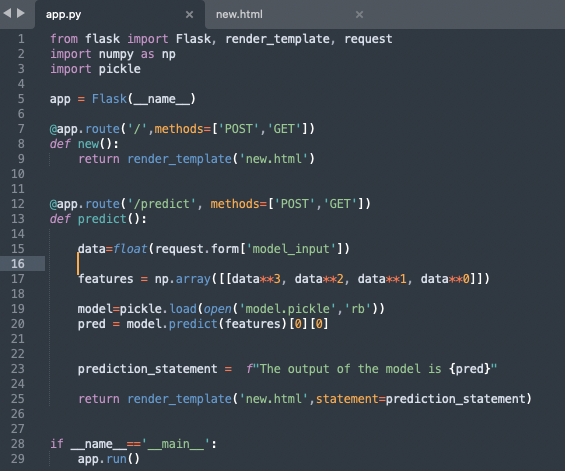
The implementation of the web application (Image by author)
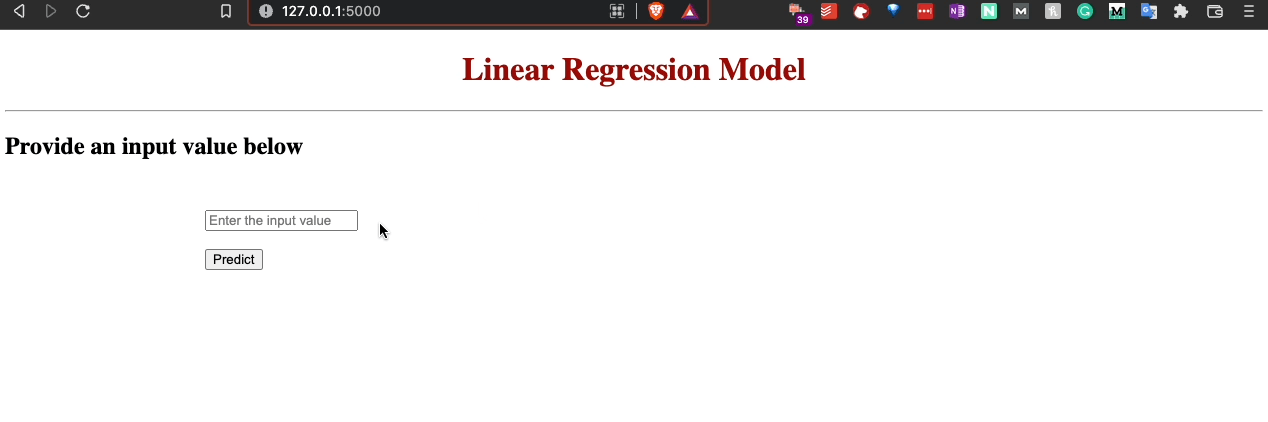
app.py file defines two methods, new() and predict(). The new() method corresponds to the “/” URL of the app and returns the new.html web page.predict() method is used to compute the model’s prediction. As the user clicks the “predict” button on the web page, a POST request is sent to the predict() method.new.html page again and send a prediction_statement which is displayed to the user.To execute the app, run python app.py in the project directory. Once the server starts running, head over to http://127.0.0.1:5000/ in any local browser to open the app.
The walkthrough of this app is shown below:
A walkthrough of the Flask web application (Gif by author)
As depicted in the gif above, the user gets a form to input a value. This is taken to the back-end for processing. Once the model makes its prediction, the predicted value is displayed to the user.
Now that we have trained the machine learning model and integrated it into a web application, our final step is to deploy the application to a Heroku Server — a free cloud-as-a-service platform to deploy any web app.
Supported programming languages include Java, PHP, Python, Go, etc. Moreover, most data scientists use Heroku to gain hands-on experience deploying models on the cloud. However, before deploying an app, you should create an account on Heroku.
To push the code to Heroku servers and deploy, Heroku provides three different ways: Heroku git, GitHub, and the container registry.

The options to deploy code to Heroku servers (Image by author)
I will use Heroku Git in this post to deploy the model.
Now, let’s begin with the deployment process.
In terms of package requirements, you should install the gunicorn package in python as follows:
pip install gunicorn
Next, you should install the Heroku Command Line Interface (Heroku-CLI). Depending upon your operating system, you can find the instructions here.
Before pushing the code to deployment, you should specify the requirements of your projects in the requirements.txt file. The file for this project appears as follows:
Flask==2.1.0
Werkzeug==2.0.3
numpy==1.21.5
gunicorn==20.1.0
jinja2
Werkzeug
itsdangerous
Next, create a new file and name it Procfile, and add the following command:
web: gunicorn app:new
Essentially, the file lets the production environment know which function in the app file is the main method. Moreover, it also provides the command that the app will run while starting up. The app:new part signifies that the main file is app.py and within that, the new() method is the primary function.
After this step, your directory structure should appear as follows:
Linear_Regression_Model
├── templates
│   ├── new.html
├── app.py
├── model.pickle
├── requirements.txt
└── Procfile
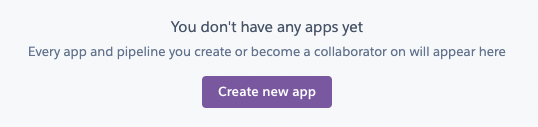
Navigate to your account dashboard and select Create new app.
The option to create a new app on the Heroku account dashboard (Image by author)
Next, type a name for your application and select Create app.
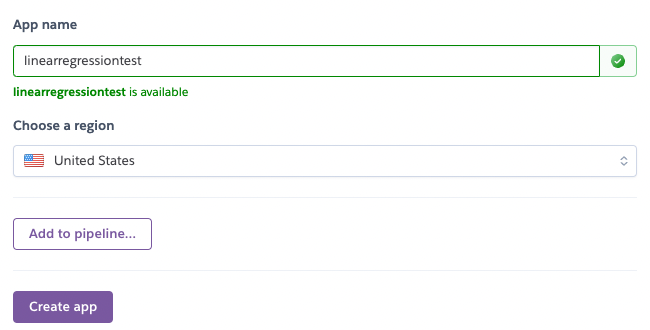
The field to input the app name to host on Heroku (Image by author)
Once you have created the app, you can begin the deployment process, which is demonstrated in the next step.
First, select Heroku Git as the “Deployment Method”.
The options to deploy code to Heroku servers (Image by author)
Open the terminal on your local computer and log in to Heroku. Make sure you have installed the Heroku-CLI.
$ heroku login
Next, navigate to your project and initialize a git repository as follows:
$ cd my-project/
$ git init
$ heroku git:remote -a linearregressiontest
Now, commit your code to the repository and deploy it to Heroku using Git.
$ git add .
$ git commit -am "deployment step 1"
$ git push heroku master
If the deployment is successful, you should see the following logs in the command line:

Image depicting successful deployment (Image by author).
With this, your Machine Learning model has been deployed successfully! The application can be accessed at the following address:
https://your-app-name.herokuapp.com/
To conclude, in this post, I gave a detailed walkthrough of how you can deploy a machine learning model from scratch.
Specifically, I first demonstrated the training of a simple linear regression model, followed by integrating it into a web application developed using Flask.
Finally, I illustrated the step-by-step procedure to deploy the web application to a Heroku server using Heroku Git.
You can find the code for this article here.
More like this
Are you an FMCG company looking to streamline your distribution process?
19 Views, 0 inspired
Why Your Small Business Needs Sales Force Automation
13 Views, 0 inspired

7 Useful GitHub Repositories to Become a Pro React Developer
136 Views, 12 inspired
The Secret to Mastering ML
88 Views, 25 inspired
Top 7 Tweaks and Tricks to Improve React Performance
58 Views, 16 inspired
An A-Z of useful Python tricks
77 Views, 34 inspired
JavaScript concepts that every developer should know
57 Views, 27 inspired
This is all you need to learn React.js.
53 Views, 14 inspired
Model-View-Presenter: Android guidelines
32 Views, 58 inspired
Deep learning weekly piece: the differences between AI, ML, and DL
40 Views, 39 inspired
There’s never been a better time to learn Android development
40 Views, 53 inspired
Why the net giants are worried about the Web 3.0
54 Views, 19 inspired
Cousins of Artificial Intelligence
122 Views, 90 inspired
A detailed guide on developing Android apps using the Clean Architecture pattern
70 Views, 0 inspired
Why Progressive Web Apps Are The Future Of Web Development?
34 Views, 45 inspired
The Secret to Strong AI
37 Views, 1 inspired
What exactly can you do with Python? Here are Python’s 3 main applications.
90 Views, 1 inspired
Android Application Architecture
70 Views, 0 inspired
JavaScript: A Basic Guide to Scope
48 Views, 0 inspired
The Difference Between Artificial Intelligence, Machine Learning, and Deep Learning
31 Views, 1 inspired
Learn to Create SVG by Coding in Minutes 😎
123 Views, 1 inspired


 Comment


Pankaj 14 Sep, 2022
Just skimming your article, I wanna ask, do you reckon that Heroku will eliminate the free tier plan this year? https://thenewstack.io/where-can-heroku-free-tier-users-go/#:~:text=Eliminating%20the%20Free%20Tier&text=%E2%80%9CIn%20order%20to%20focus%20our,well%20as%20deleting%20inactive%20accounts.%E2%80%9D